How to Build a Sauna
 The boards arrive, western red cedar, 11/16″ thick, kiln-dried, to be specific; and the sweet smell of cedar is incentive for Mark to pick up bats of insulation and load them into the truck as Nathaniel picks up where he left off with his academic work. And as the fall semester gets underway, the professor-in-residence finds a few hours here, and a few hours there, to figure out what he is doing, and to learn how to do what he is doing well.
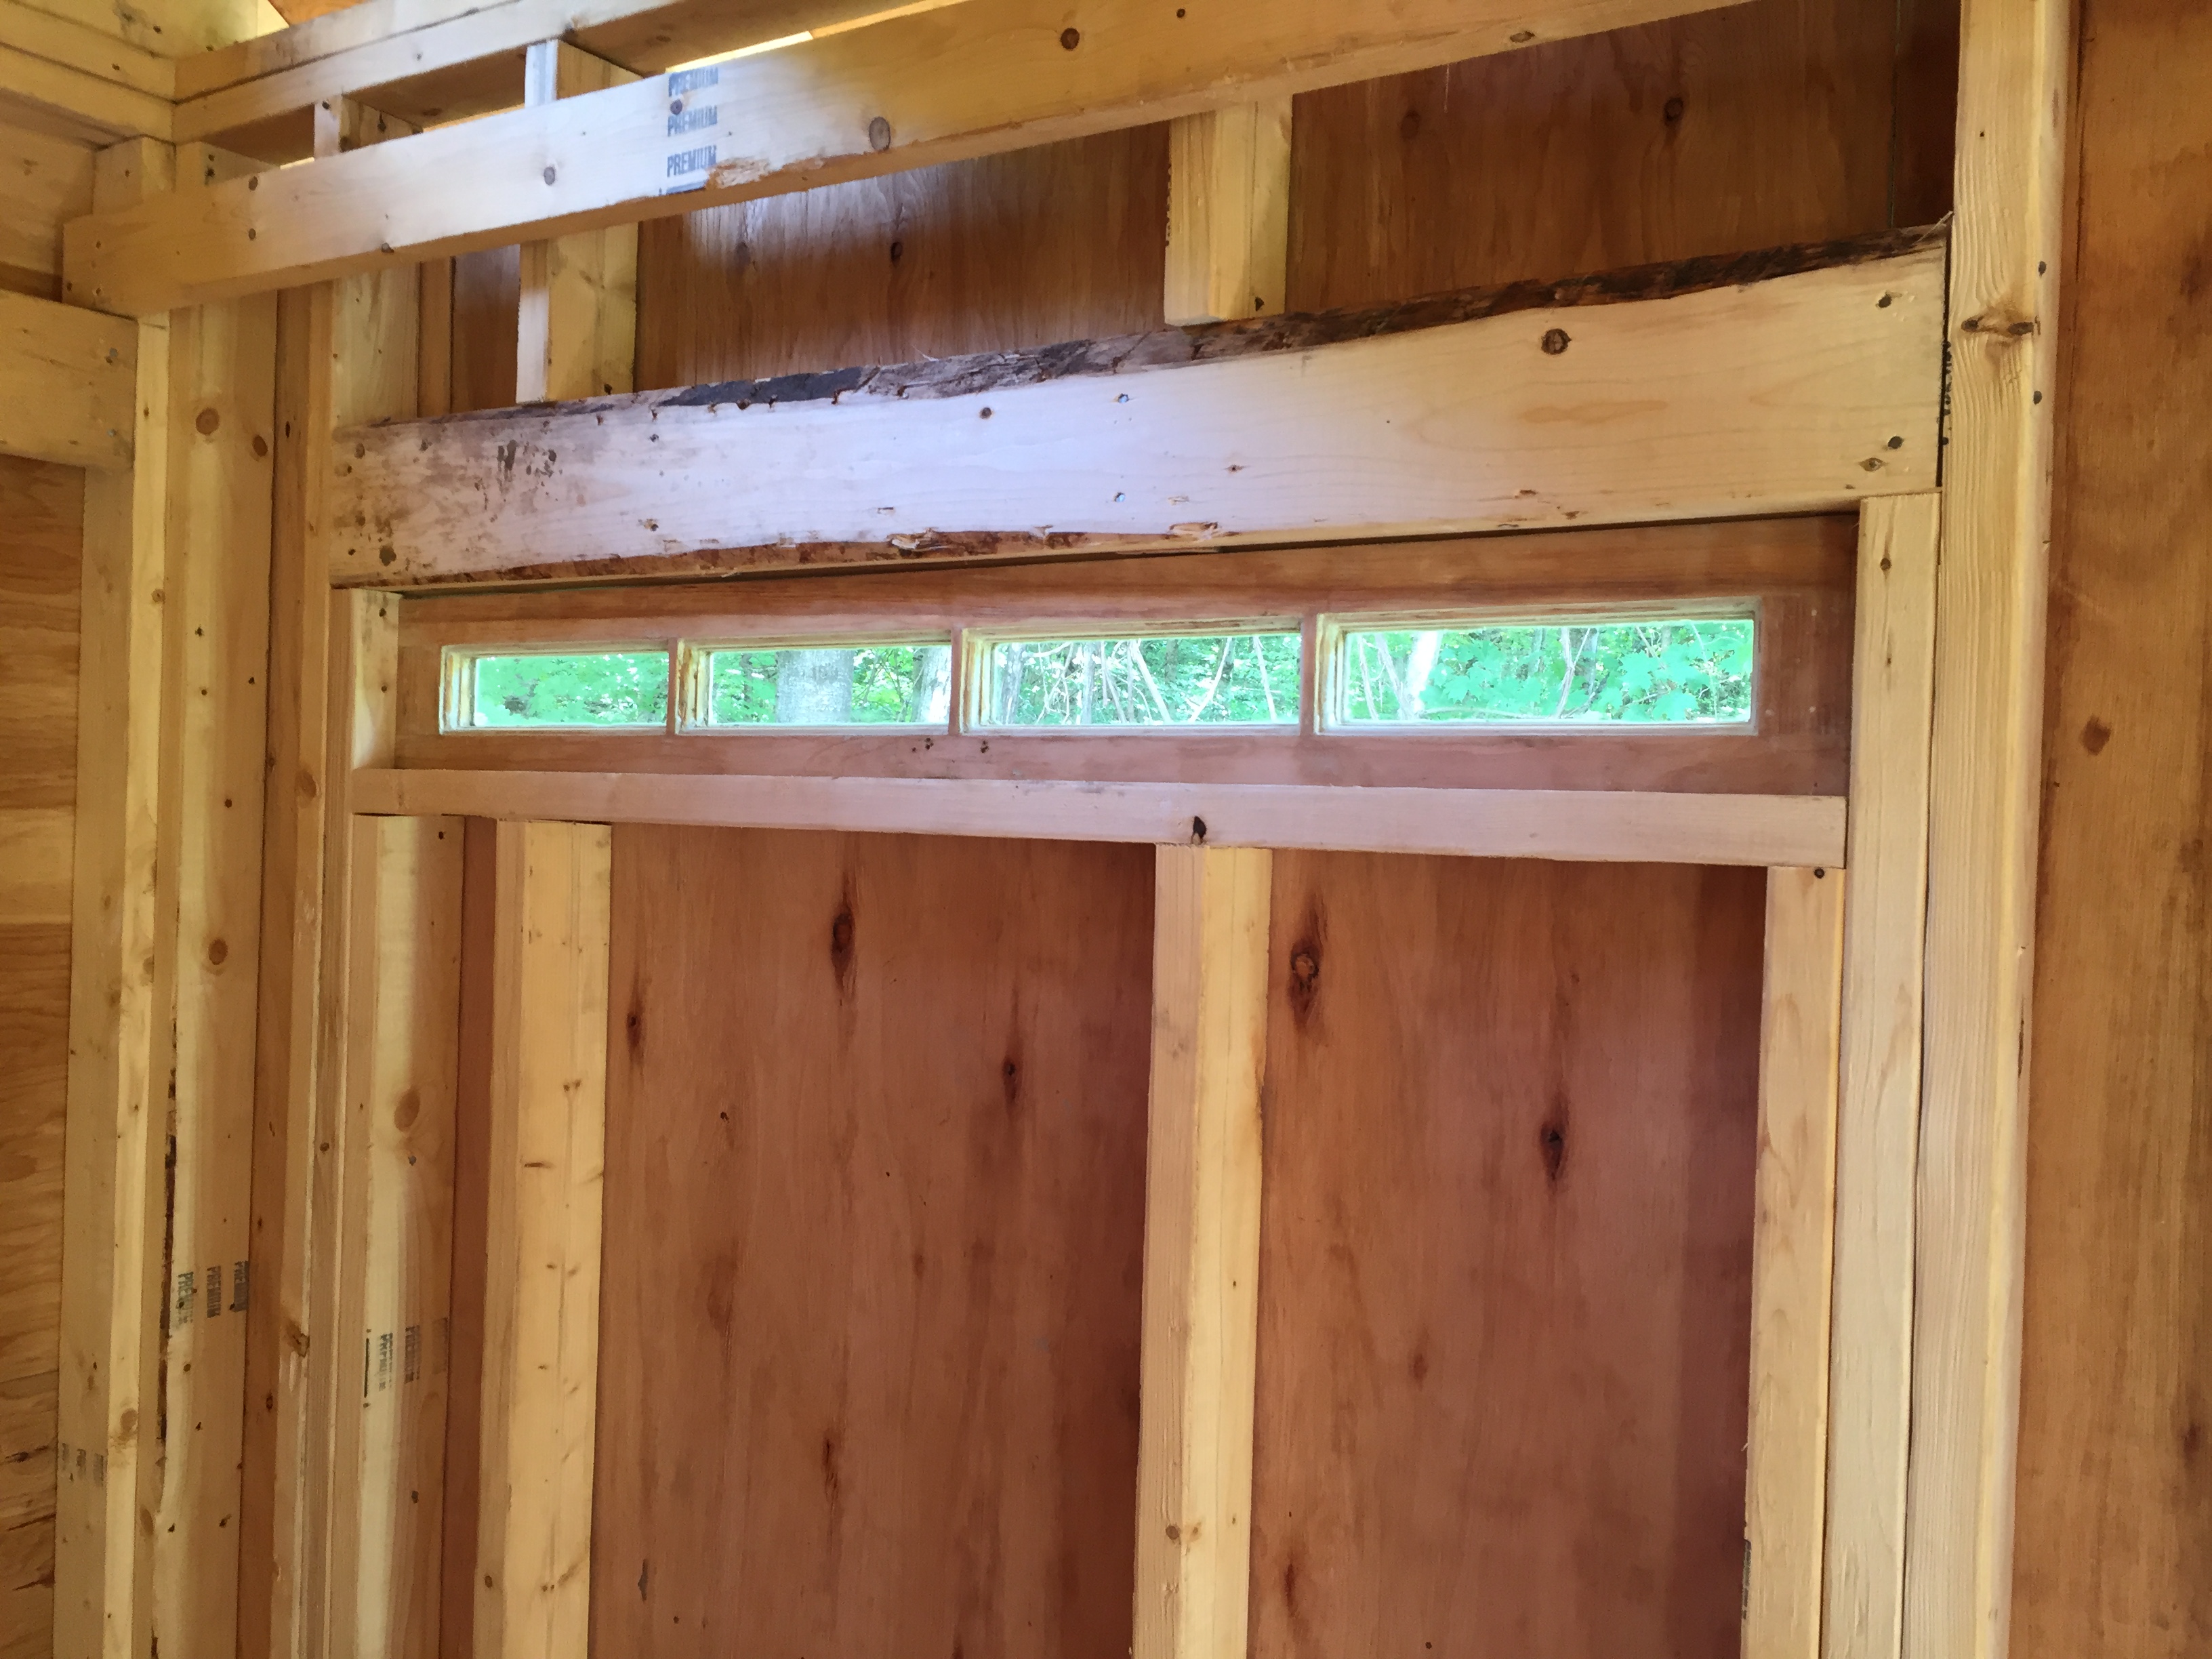
The first order of business is to finish the sauna walls, and to frame in the sauna windows, including the narrow four-pane fellow we picked on a window salvage tour. King studs, jack studs, cripples–new terms in an unfamiliar discourse for sure.
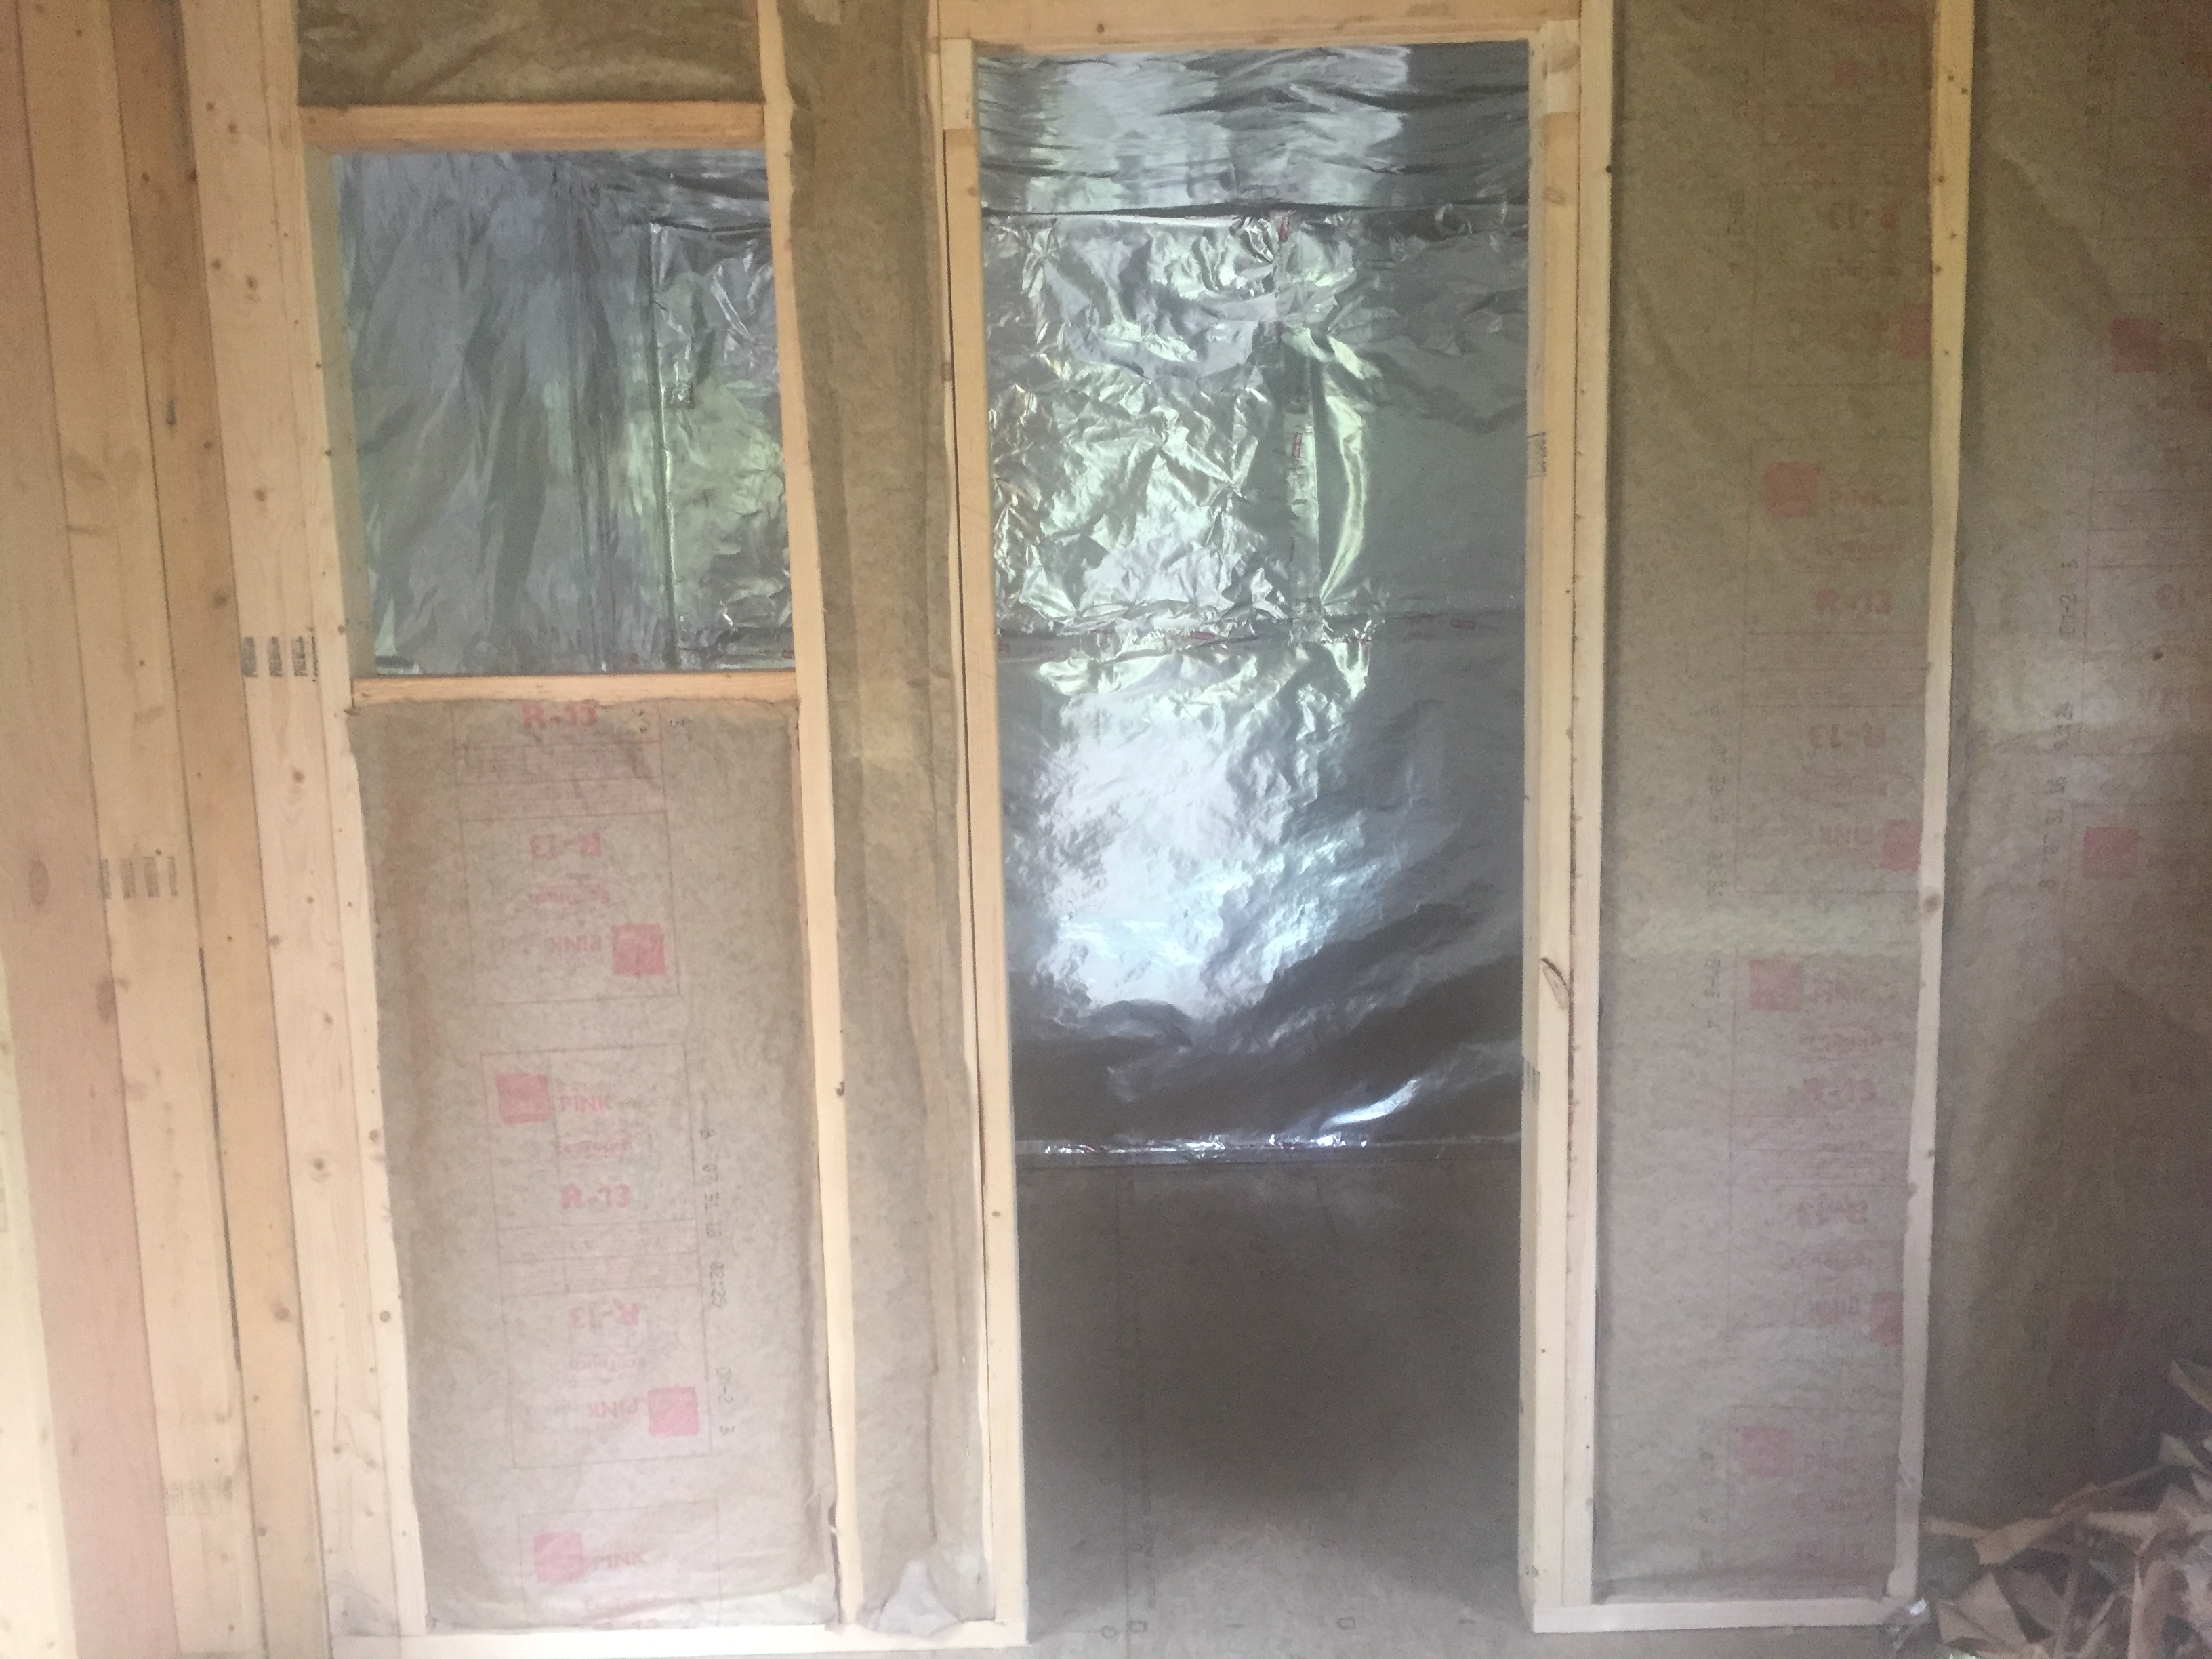
The walls are insulated and the 6×8 interior is wrapped and stapled with foil to prepare for those sweet-smelling western red cedar boards.

Cement board is screwed into the floor and a double-wall of cement board is affixed to the studs behind the stove platform in the corner of what the sauna builders call “the hot room.” A skim coat follows and a cement platform is installed for the stove.


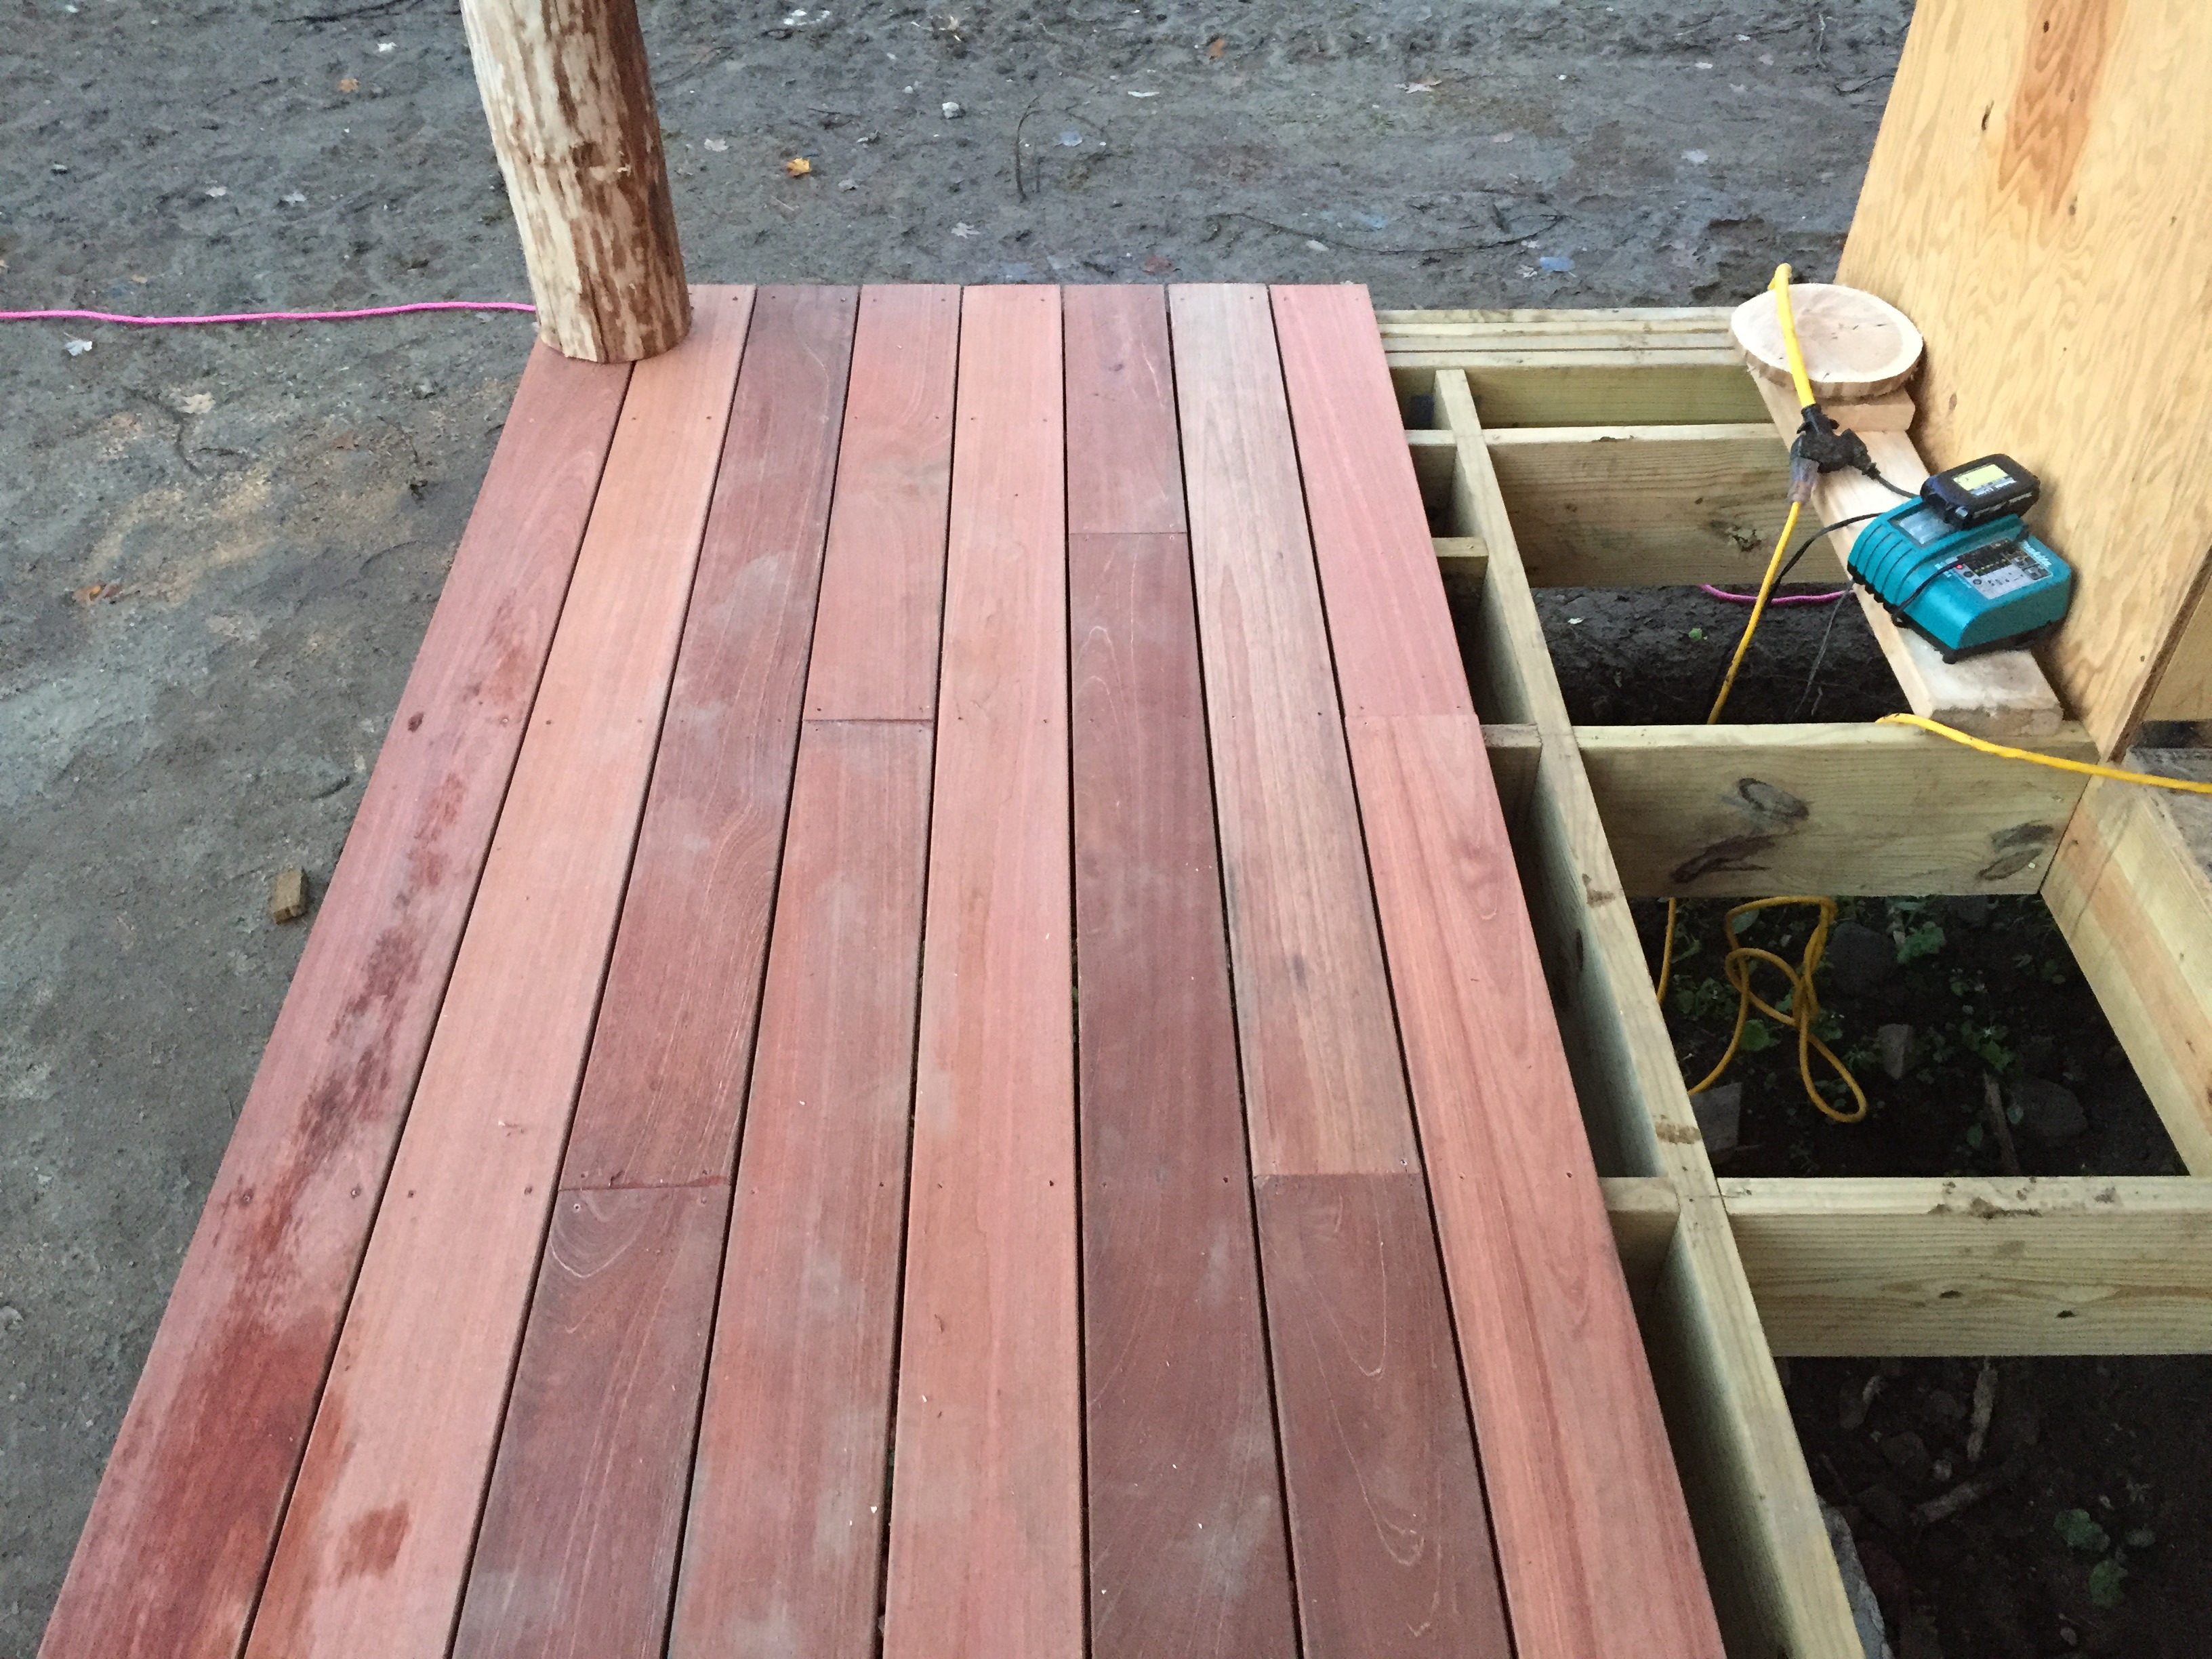
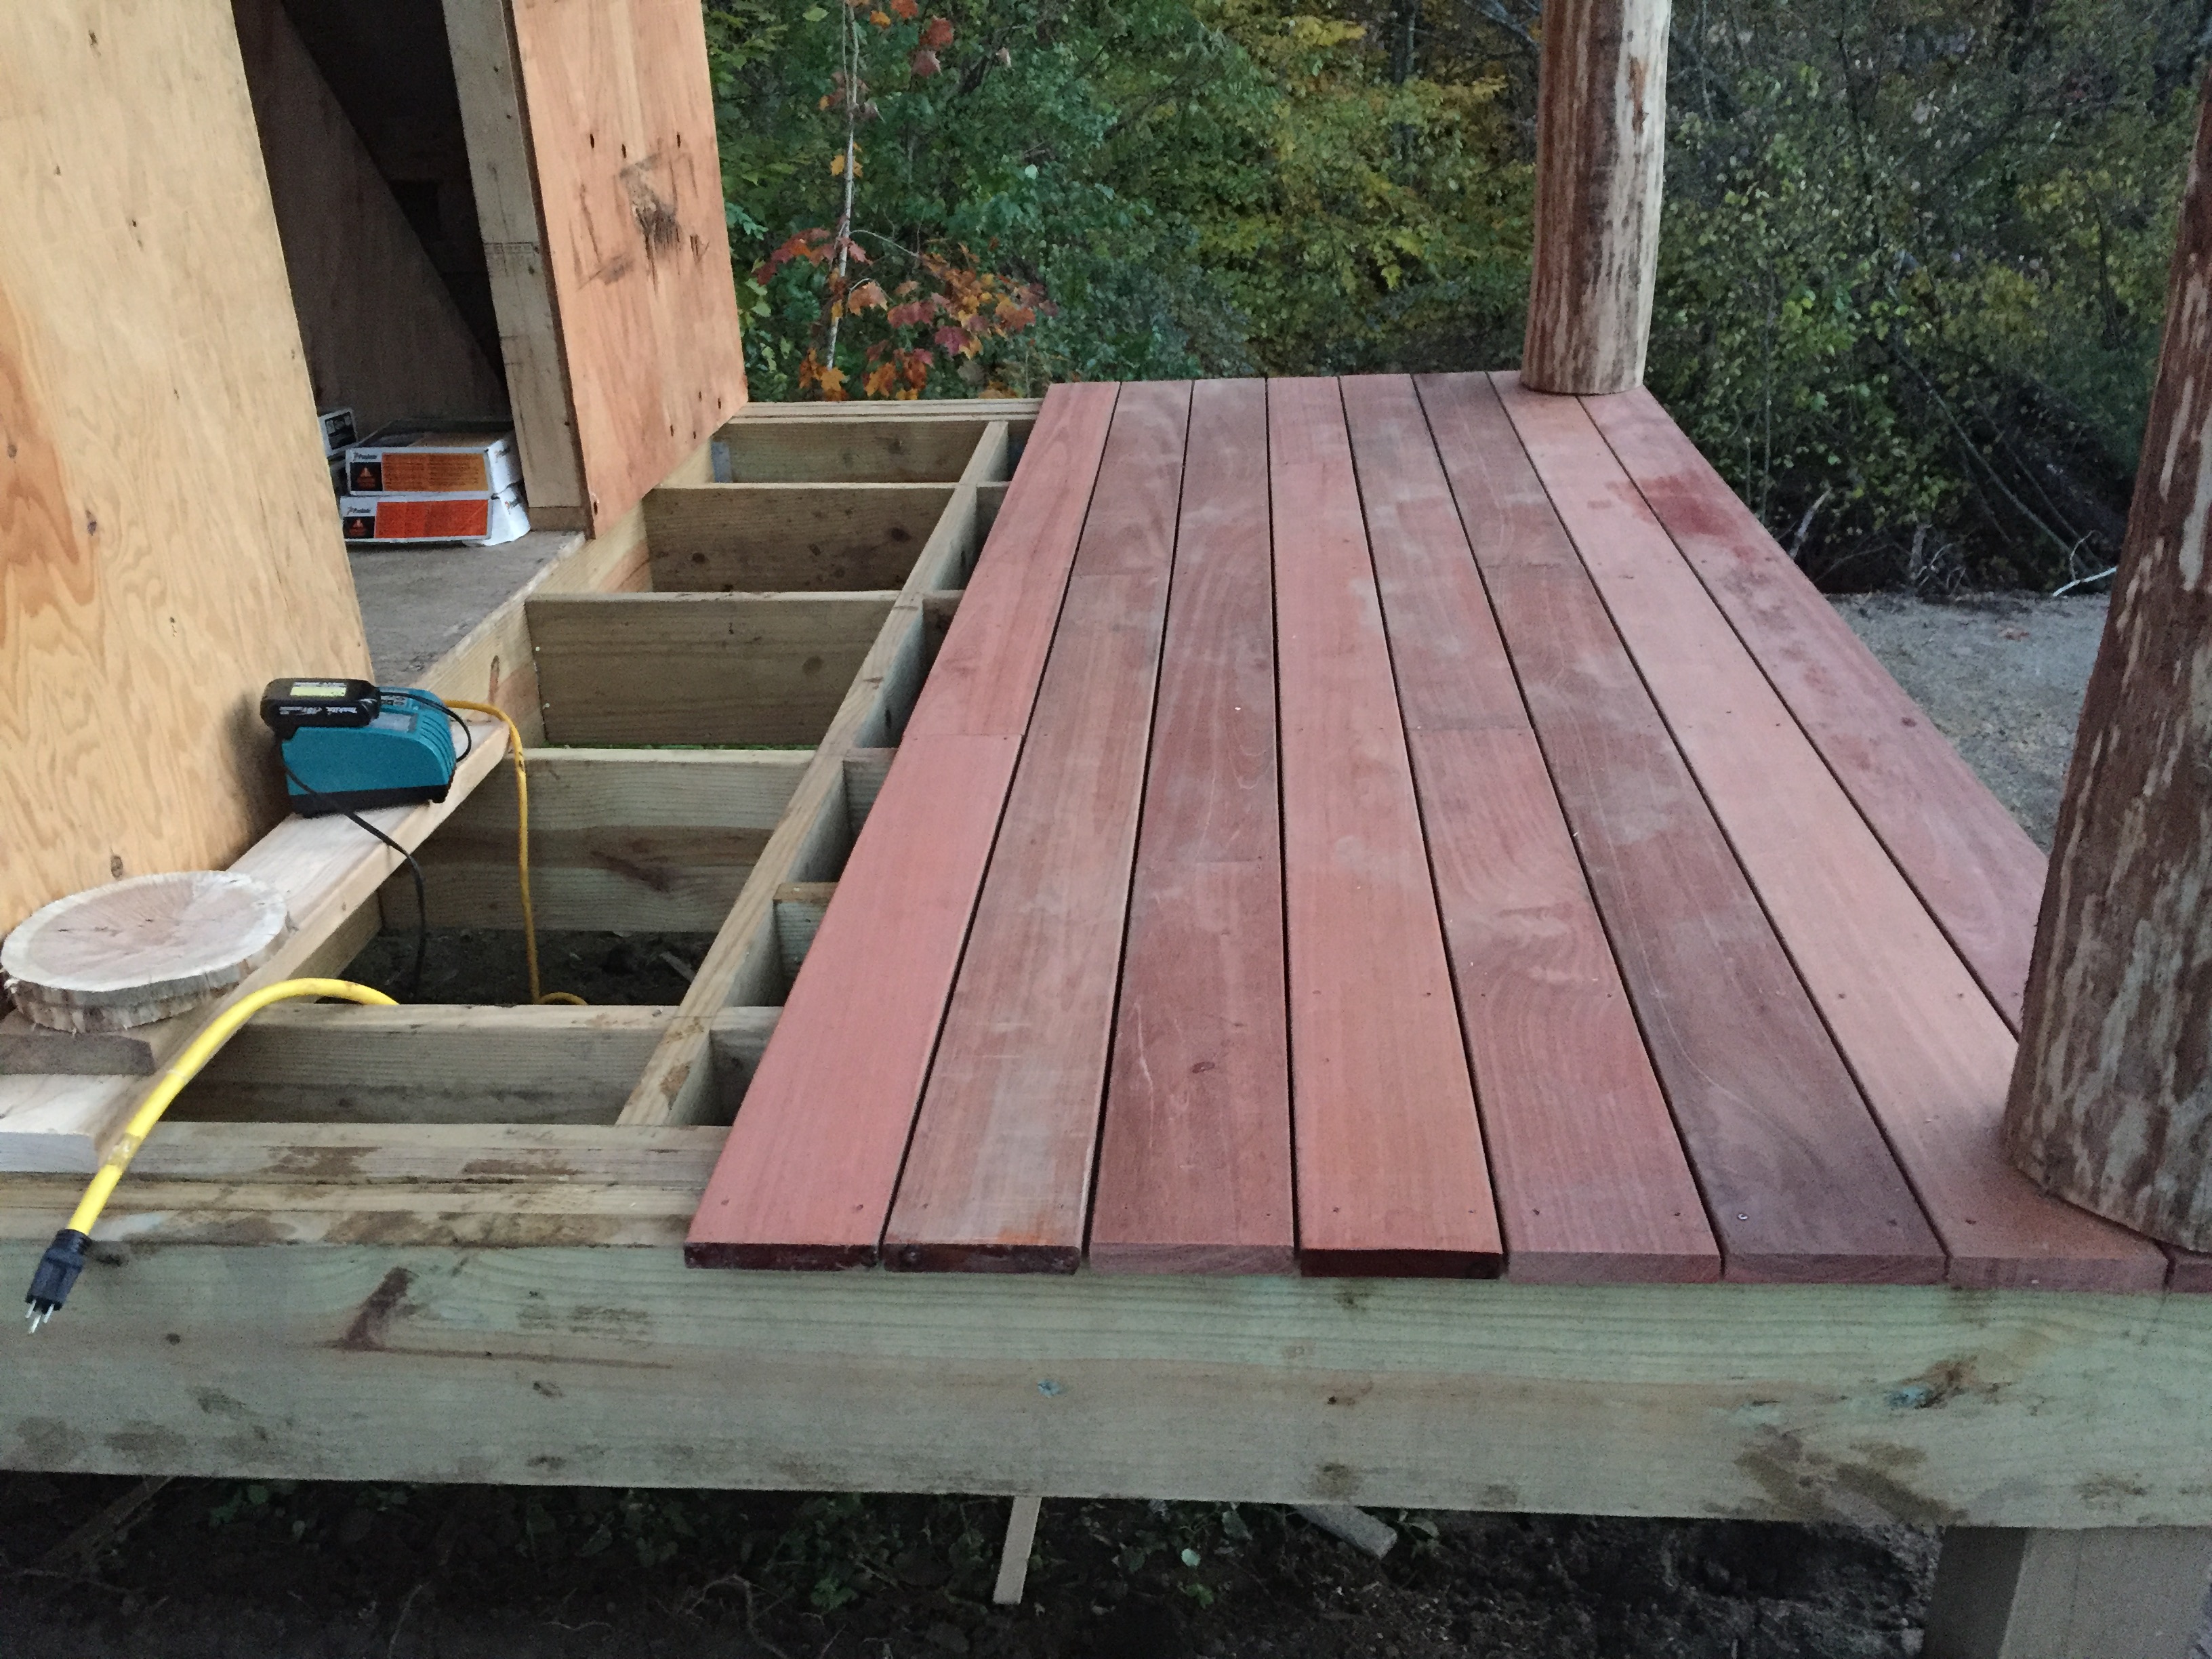
Then comes the porch: jacking the roof, cutting the cherry logs, screwing down dense mahogany boards.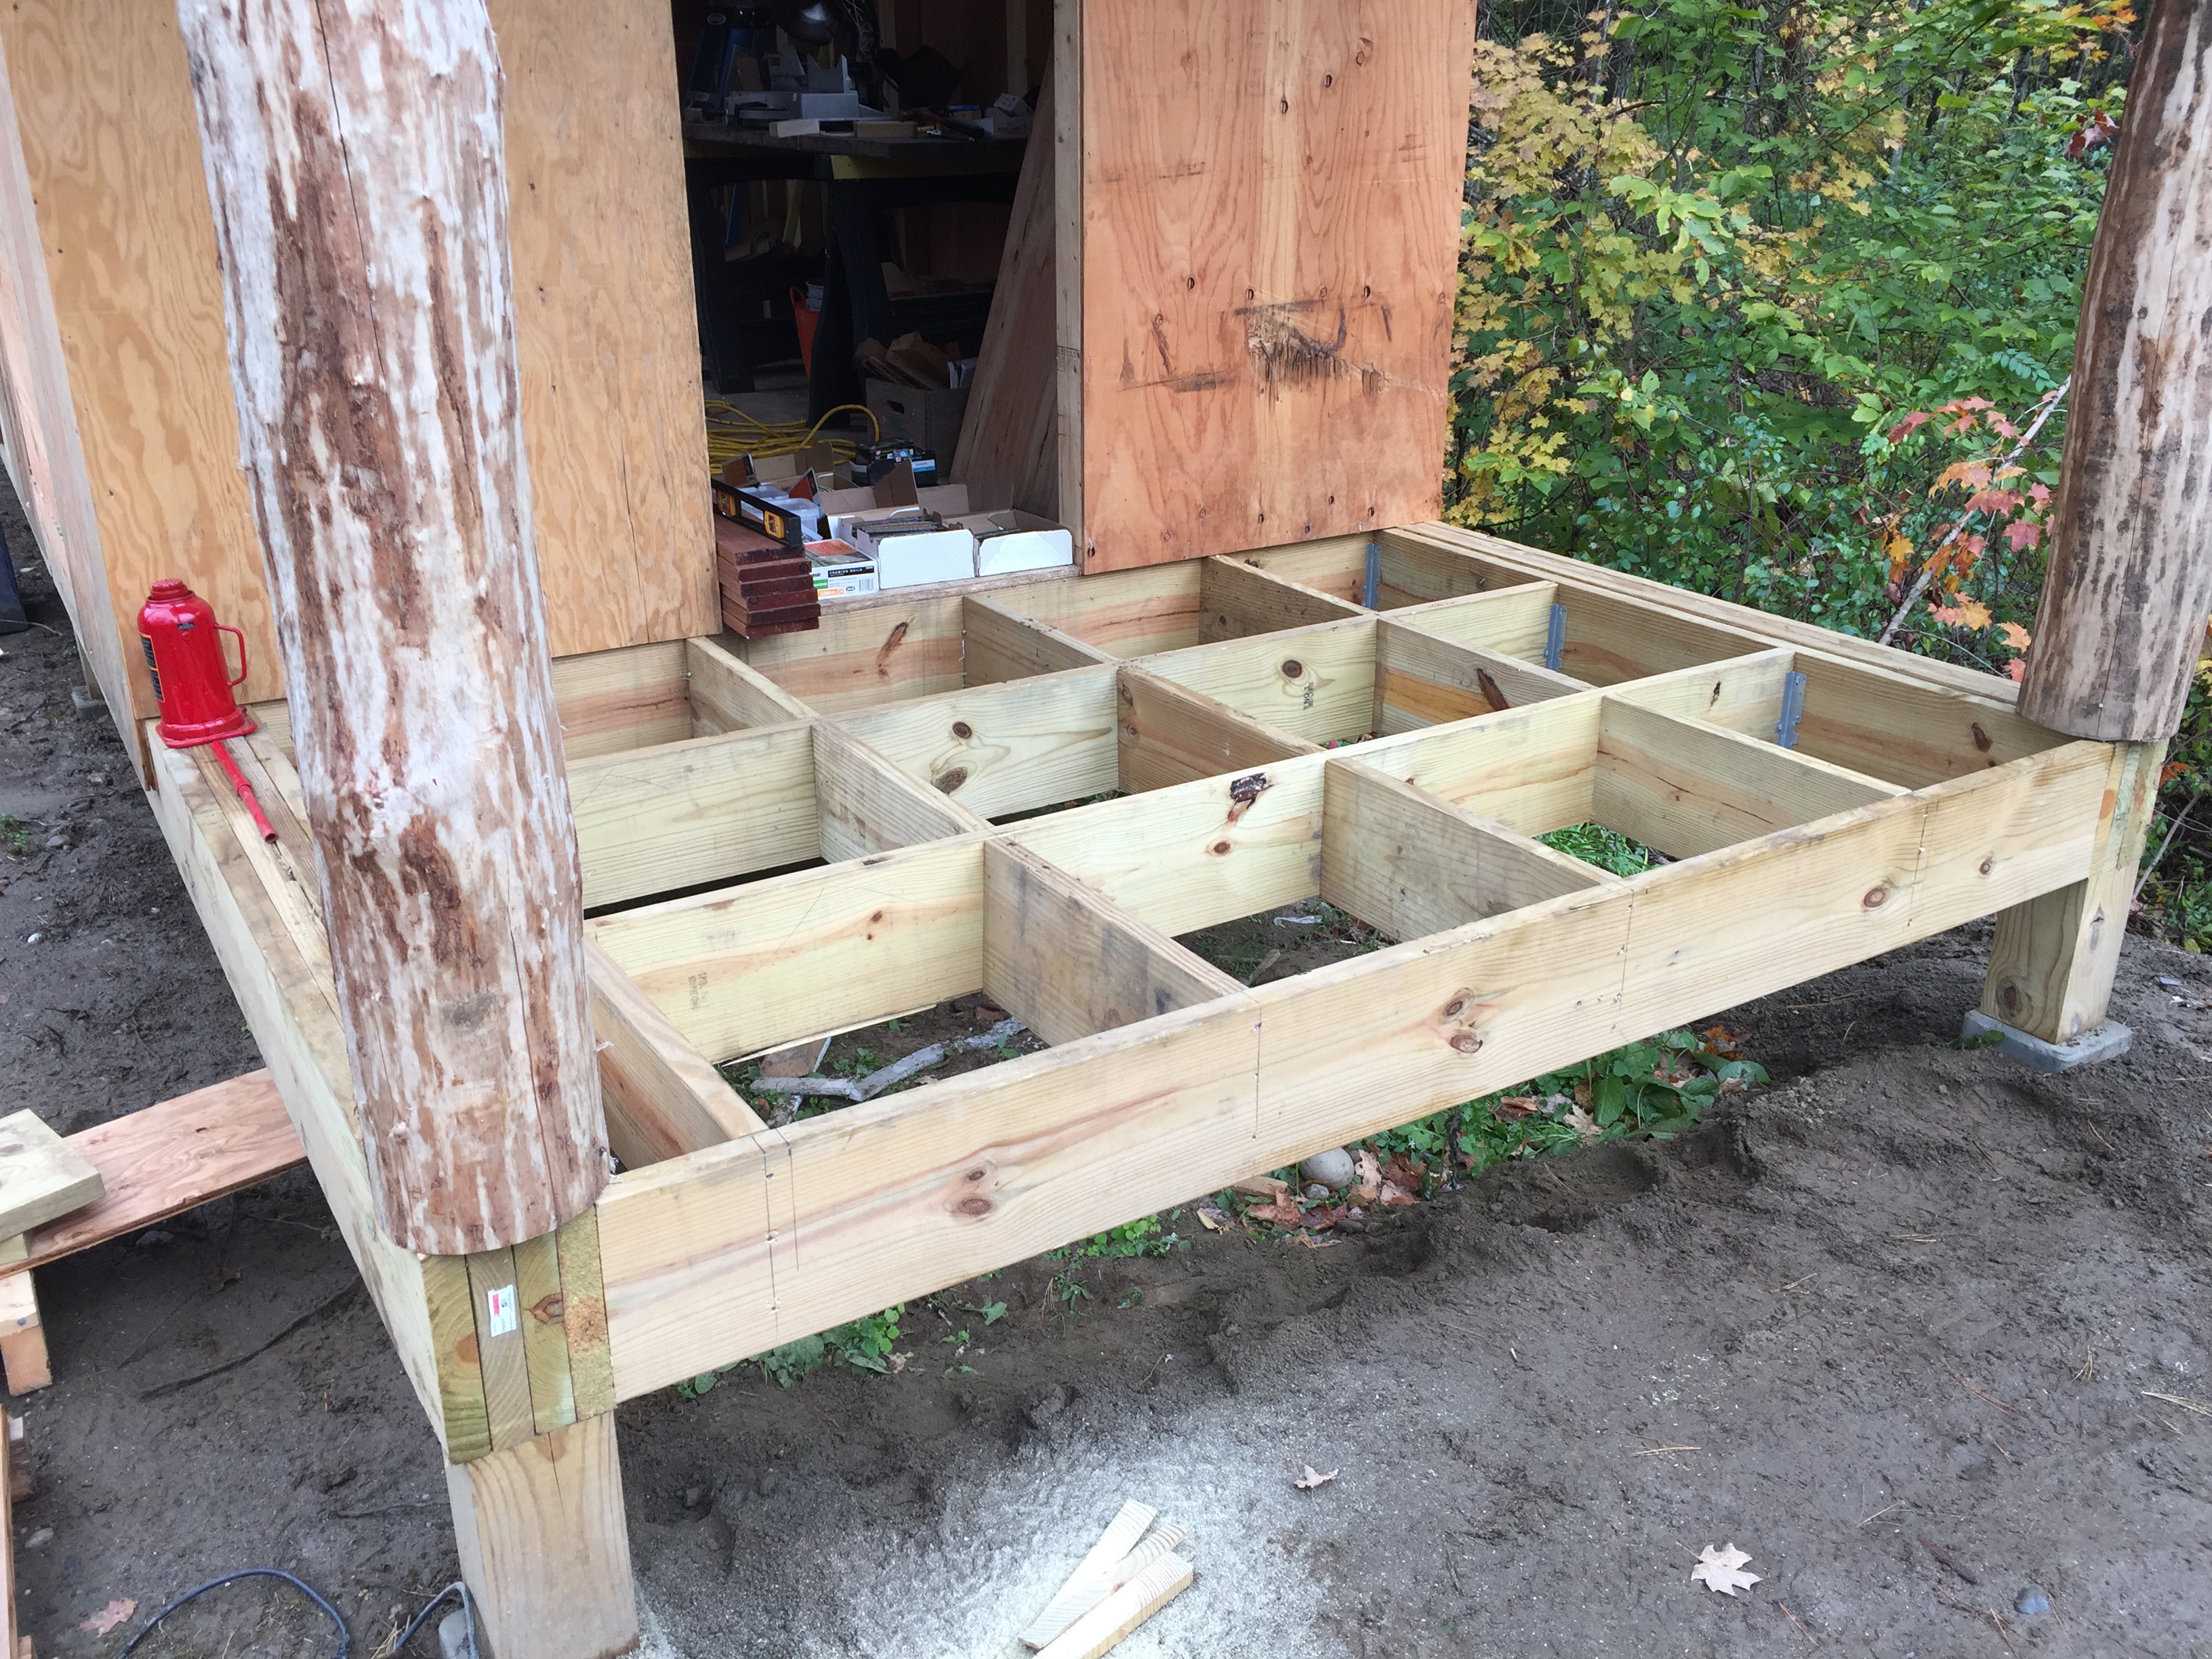

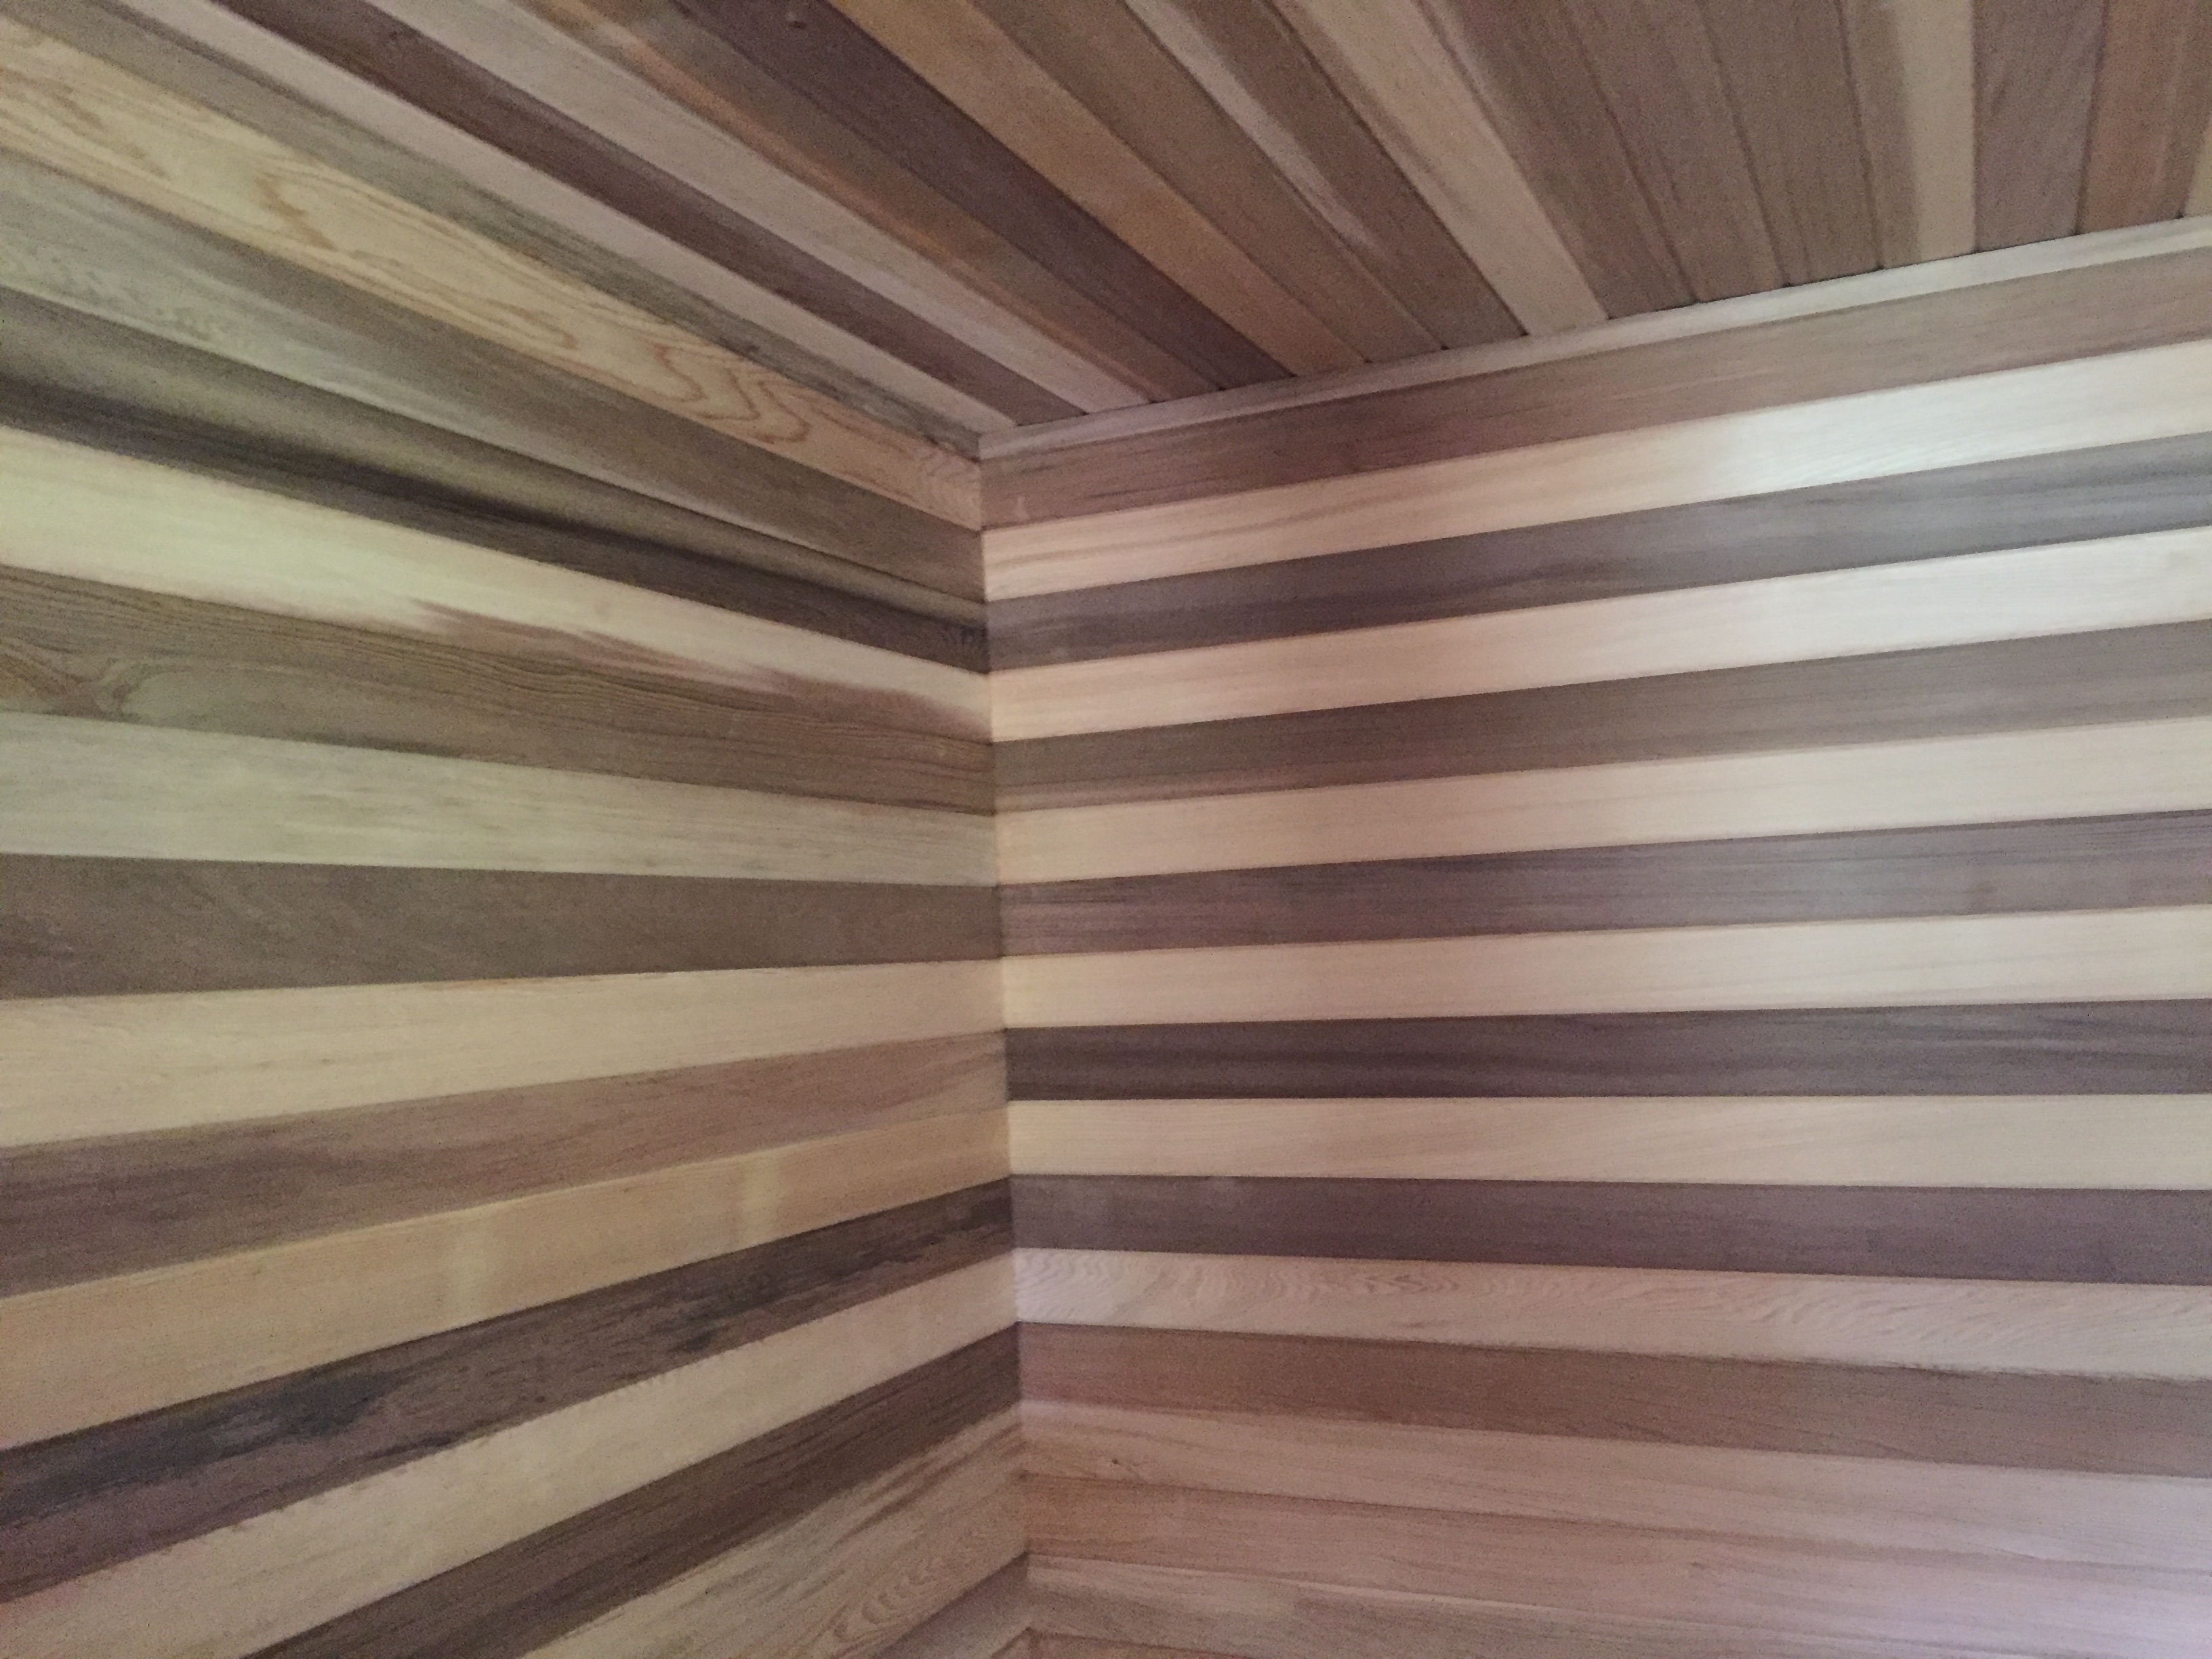
Back inside the sauna, a finish nail gun in hand, and a chop saw and level, Mark goes to work. Standing on a skim-coated floor, with a drip board installed, and stacks of sweet-smelling cedar boards in house, Mark begins nailing the back wall.

From the back wall to the ceiling to the side walls to the front wall: nailing and fitting cedar boards.
Then the benches are built and frames installed and the benches screwed into the frame and mom drops in to demo the benches and admire the handiwork of her eldest son.

No longer an idea, but a thing: the stove and stove pipe in, the mahogany porch cut and nailed in, the sauna windows installed
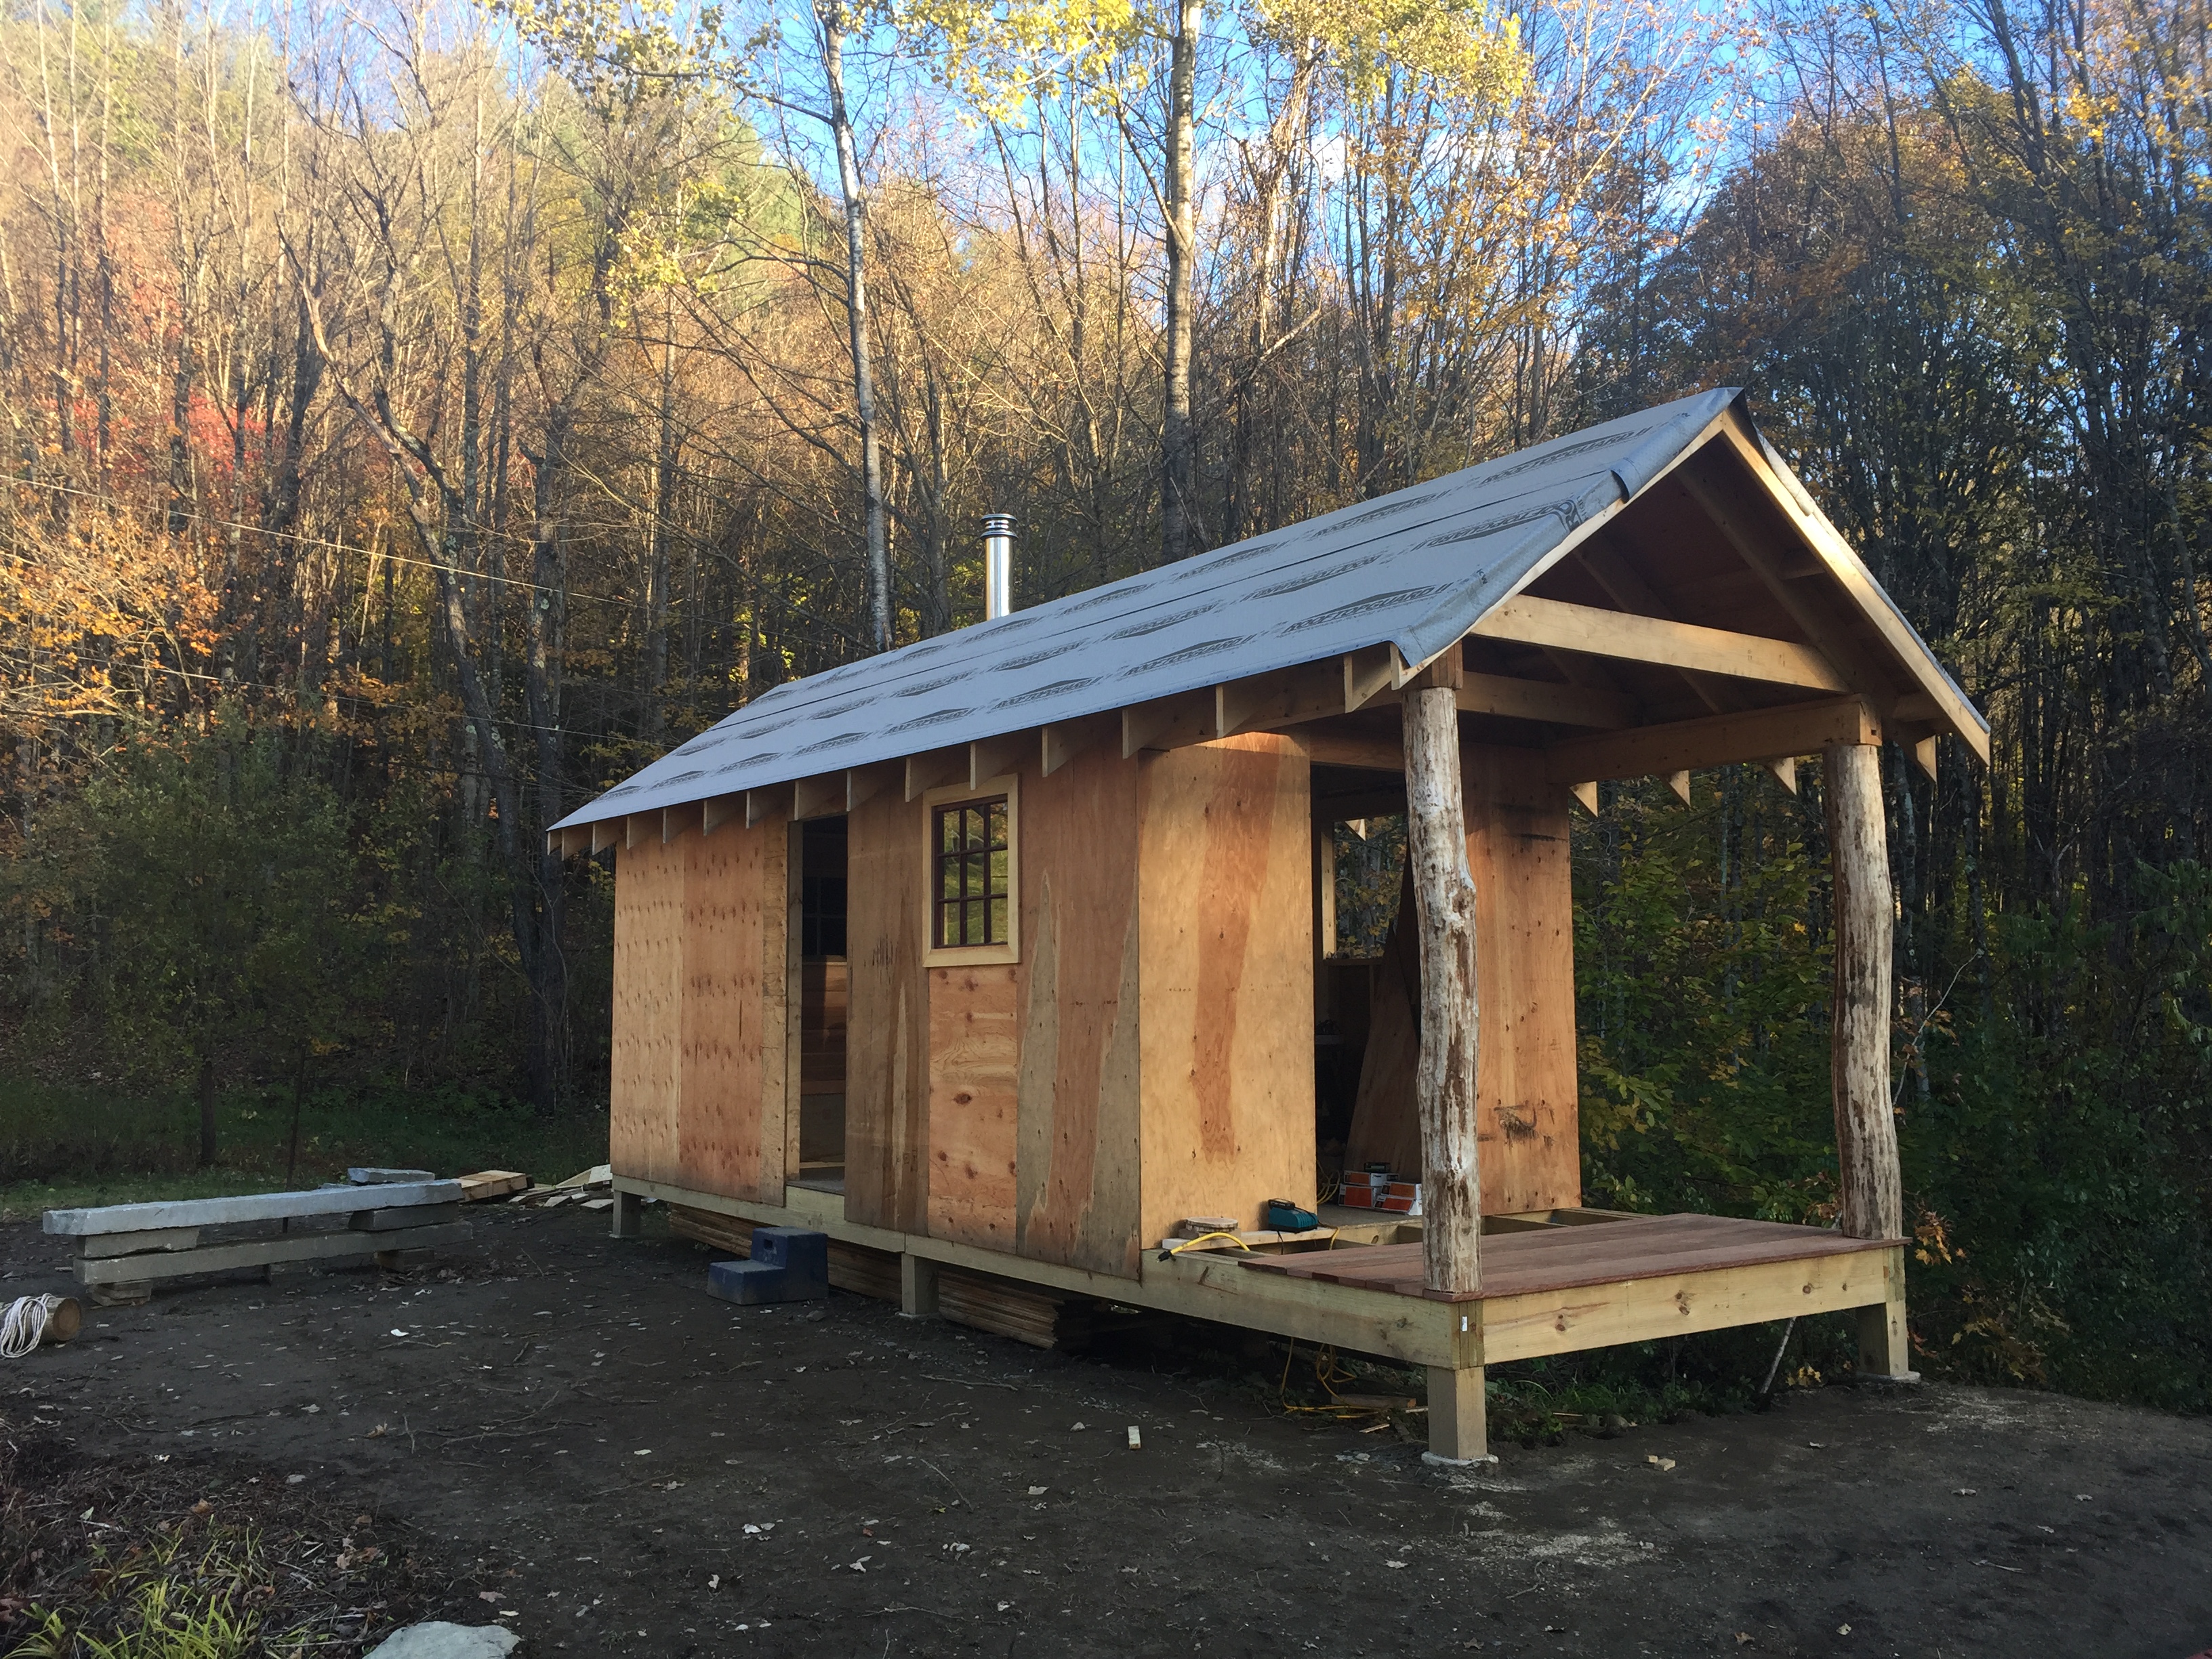
The salvaged clerestory window looks nice, a view out from the top sauna bench into the poplar trees behind the building. And below the window, trucked in from Minnesota, a Kumma sauna stove in its rightful place and installed.

And with the stovepipe installed, the first fires are kindled to keep the room warm during episodes of late-afternoon work on the benches and interior trim.

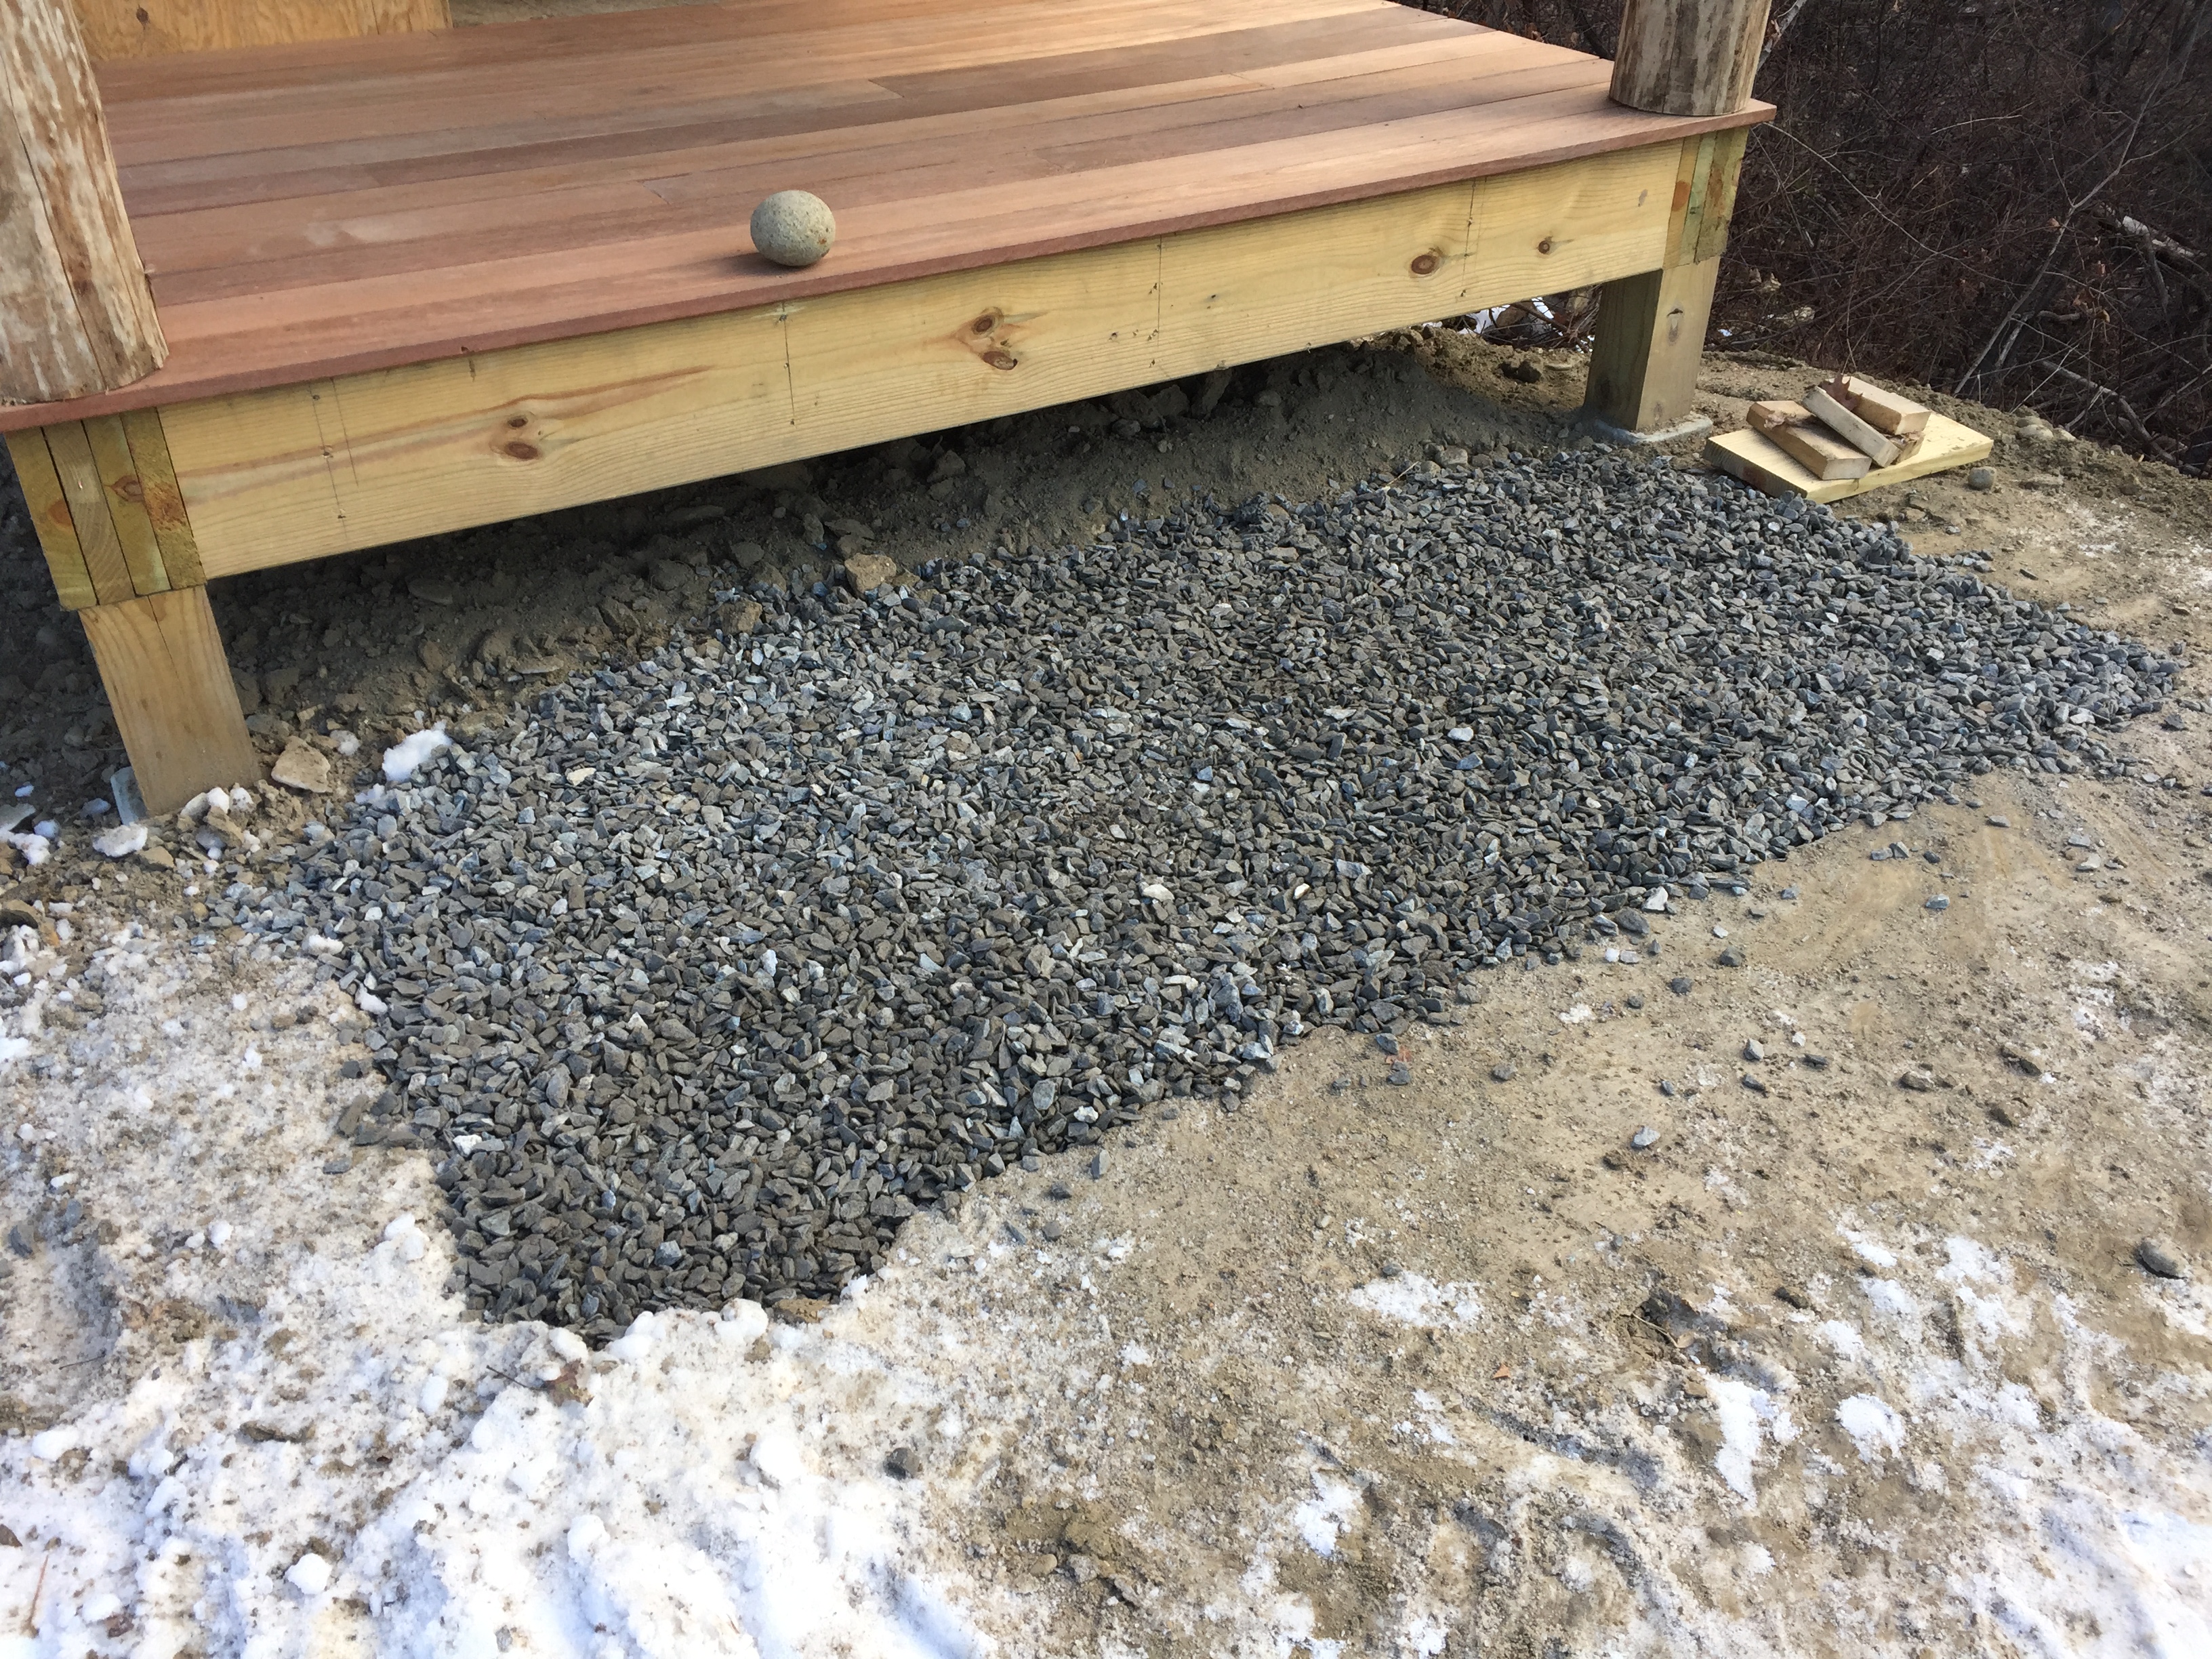
After installing the porch, Mark is thinking steps before winter snow flies; and yet, as if on cue, the ground freezes hard. But it is only a few inches of frost, and nothing some determination and a little chopping will not undo.
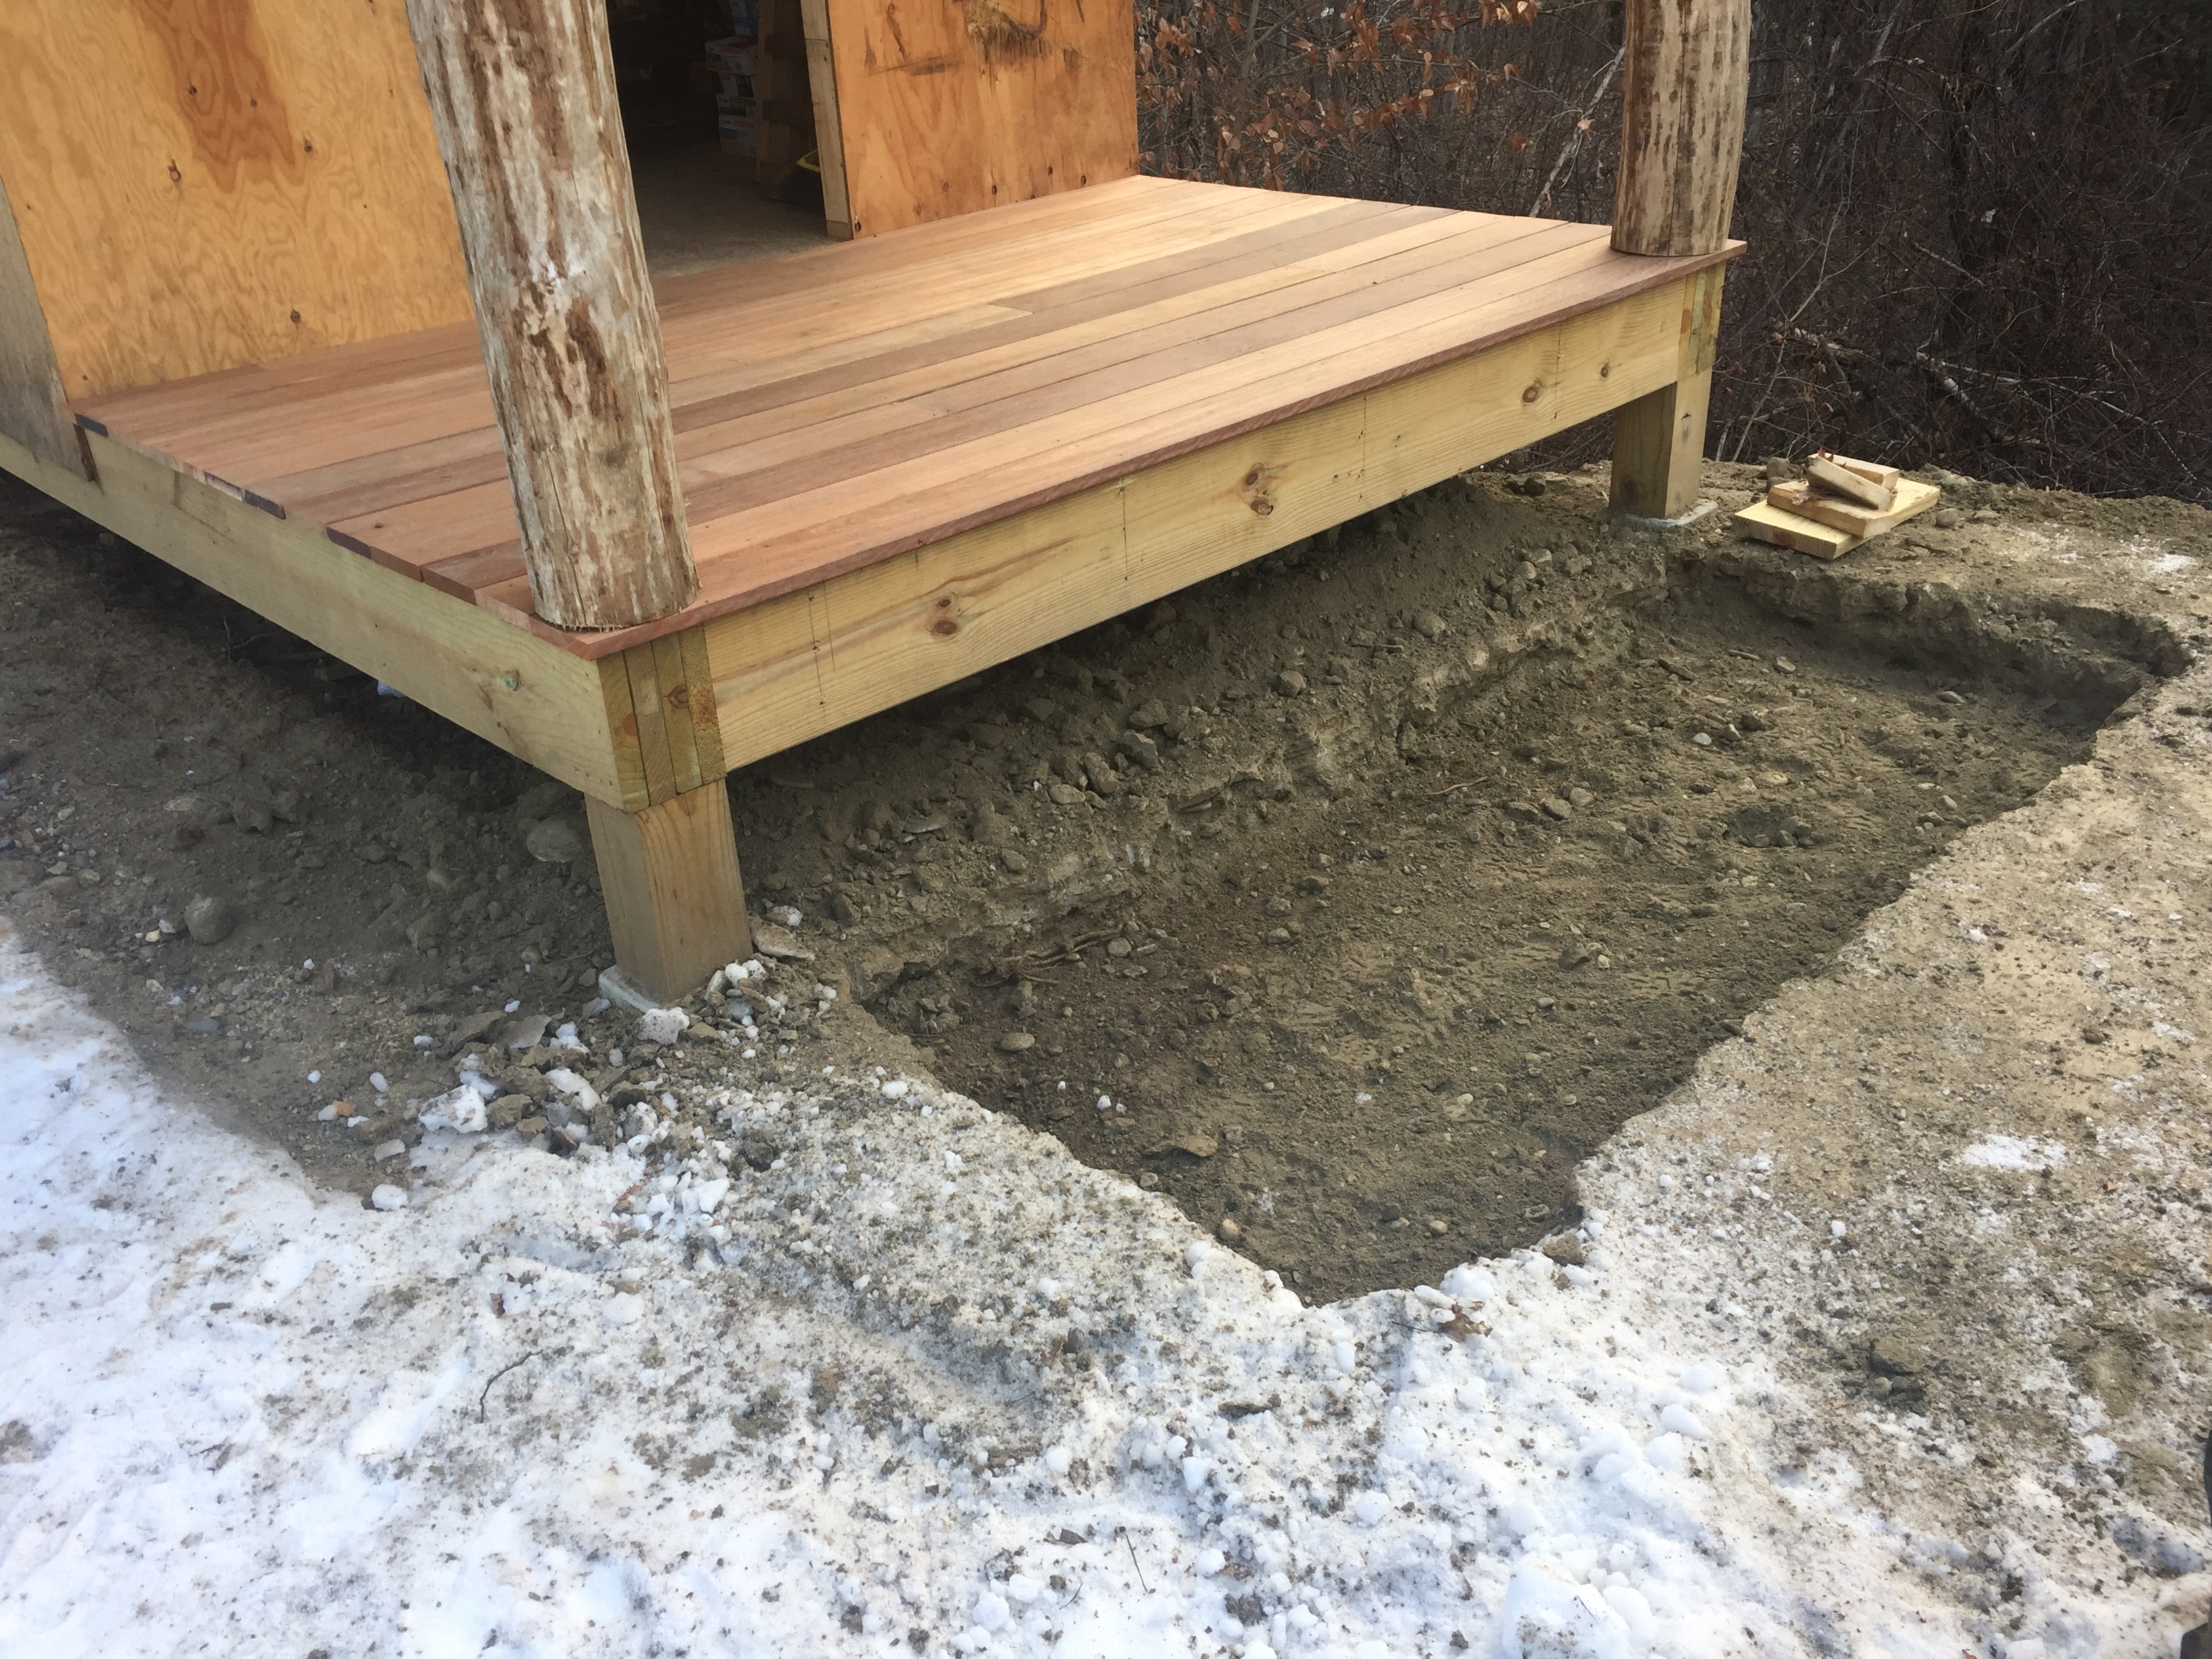
Then a few tractor buckets of crushed stone are deposited and spread to provide a stable base for the granite steps.
Diesel and hydraulics and New Hampshire granite and some lengths of chain: Mark has the upper hand on a brisk early-winter afternoon.

The steps to the porch will be finished in the spring when stone gathering will be the activity of the day.

For now, a way up, and in.
Leave a Reply